It's been a while since I last updated this blog. Starting a new (now not so new job) and having two kids does tend to make you prioritise things differently. I have also found with the current job it gives me more than enough of a chance to work on …
Articles tagged with Development
Making a musical Robot Santa ornament using an ATtiny 85
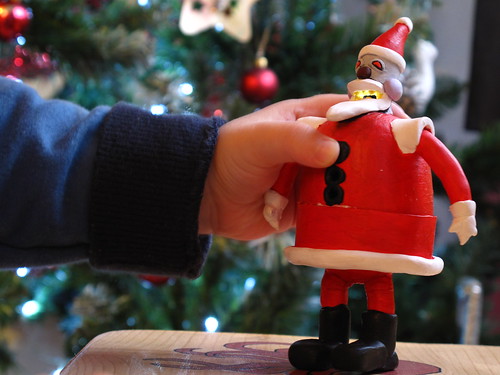
In what is threatening to become a tradition, I made a Christmas ornament again this year. Last year I just made simple tree ornaments using sculpey and fimo.
This year things got a bit more involved, as I decided to make a musical model of the Robot Santa from Futurama …
Porting chrss from Turbogears 1.0 to Django 1.3
For the a period of 18 months or so I slowly ported my chess by rss site (chrss) from Turbogears 1.0 to Django. When I started the port Django 1.1 was the latest version. I took so long to finish the port, that Django got to version 1 …
A Little Sparql
Quite often I'll get distracted with an idea/piece of technology and mull it over for quite some time. Most of the time I play through these ideas in my head and don't do anything with them. It's often just an exercise in learning and understanding. I'll read up on …
Django User Profiles and select_related optimisation
If you want to associate extra information with a user account in Django you need to create a separate "User Profile" model. To get the profile for a given User object one simply calls get_profile. This is a nice easy way of handling things and helps keep the User model …
Blinking Halloween Spider Eyes Hats using PICAXE 08m chips
For some reason I got seized by the idea of creating some electronics for our Halloween costumes this year. In previous years I have gone as far as dying my hair green for Halloween, but that is just an evening's work. This year we were having a more sedate affair …
"Ultimate" Arduino Doorbell - part 2 (Software)
As mentioned in the previous post about my arduino doorbell I wanted to get the doorbell and my Chumby talking.
As the Chumby runs Linux, is on the network and is able to run a recent version of Python (2.6) it seemed like it would be pretty easy to …
Programming a Picaxe 08m chip
After I got my Arduino I felt the urge to brush up on my general electronics knowledge. The last time I'd really played with any circuits was back in about 1994 when I was studying my Technology GCSE - which now is quite a long time ago. So I picked up …
"Ultimate" Arduino Doorbell - part 1 (Hardware)
After a first couple of small Arduino projects I felt the need to make something a bit more useful and permanent.
I had seen Roo Reynolds talking about hacking his doorbell to get it onto Twitter and as our doorbell is a bit rubbish I thought this seemed like a …
Kite Physics
I've finally managed to finish the Kite Physics Demo I started back in October:
It's more of a plaything than anything else. It did give me a chance to try out writing some physics code again, something I don't get much of a chance to do …