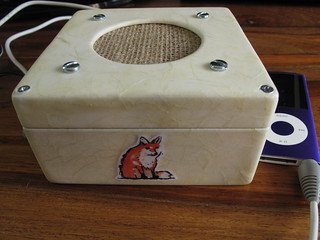
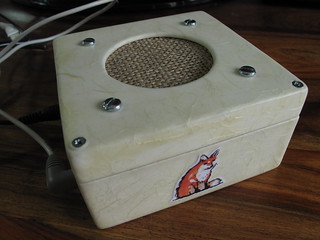
I decided to have a go at making a monobox from the MAKE site. It's basically a small battery (or mains) powered amplifier and mono speaker for playing music from an iPod/mp3 player. Here's my finished monobox:
The guide to make the monobox is pretty thorough and lists everything you need to get going. I used some slightly different parts in the end and the speaker was smaller than then one in the guide, but it still sounds good. The speaker itself was a 66mm mylar speaker from Maplin. I also used an extra 0.033µF capacitor instead of the 0.047µF too - which seemed to work ok.
At the heart of the circuit is an LM386 amplifier chip. Some of the Marshall practice amps use these chips, so you know they can't sound too bad. The LM386 is designed for low-current/battery powered circuits, but obviously can still be used with a suitable mains adapter too.
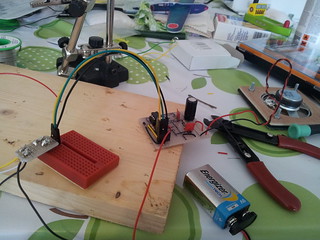
The first job in building the circuit was setting it up on the breadboard:
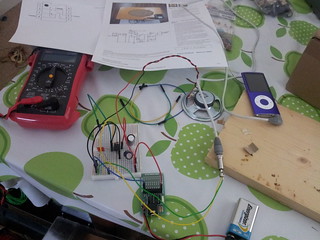
It sounded great when I first tested it out on the breadboard:
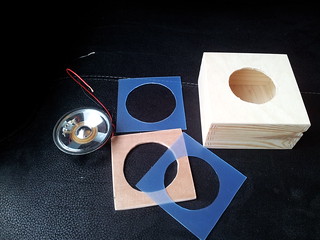
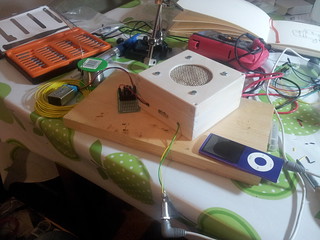
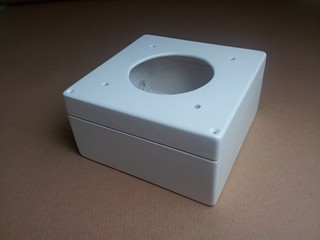
So with the circuit confirmed as working, the next step was to solder up the circuit and create a container for it & the speaker. I bought a small wooden box from Amazon to act as the case. I cut a circular hole in the box (using a fret saw and then Dremel to smooth the edges) for the speaker and cut out some pieces of plastic, foam and plywood to form a brace to hold the speaker in place:
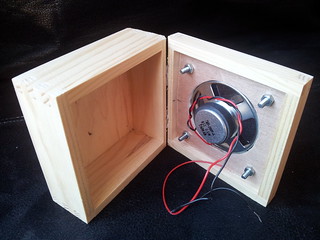
I then drilled some holes for bolts to mount the speaker inside the box:

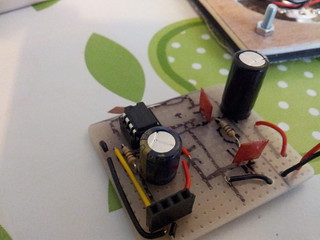
After soldering the circuit up:
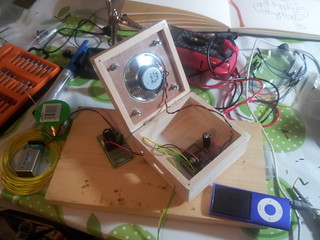
I tested the circuit out inside the box to make sure it sounded ok:
The hessian grill I'd attached was a little wonky at this point, but I decided to fix that later. There was a more pressing problem to deal with first.
A little stereo oddity
When testing out the circuit inside the box I went through quite a few different songs on the iPod. Most of them sounded good, but one in particular did not sound right. That song was "Space Oddity" by David Bowie. It sounded like you could only hear the backing track - the main vocal and other parts weren't really there. Normally that's what happens with a stereo when one speaker goes dead, but in this case there was only one speaker and it was meant to be receiving both sides of the audio. I experimented a bit and found that I could hear each side of the audio on it's own ok. It was only when they were combined that it didn't work properly. The weird thing was that most songs were ok, but not this one.
In the end I realised that it was due to how "Space Oddity" is mixed. Most songs nowadays seem to be fairly evenly spread out on both channels/speakers in stereo. "Space Oddity" on the other hand has one channel that is very quiet. This meant that the voltage coming out of that wire was normally very close to zero (at least compared to the other channel). The other channel's voltage would be higher and by combining the two wires together there was effectively a short-circuit and some of the current would go back into the iPod rather than into the amplifier. So the answer to this problem was to properly combine the stereo channels to mono. This meant to putting two low value resistors (1.5Ω in my case) in before the channels meet. This creates just enough resistance to stop the partial short-circuit that was occurring.
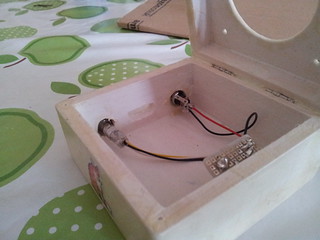
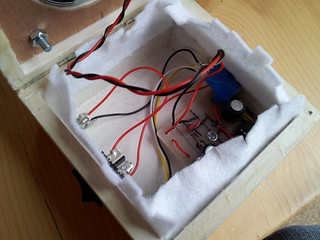
Luckily I had left the speaker and power connections on the circuit board accessible via a female header, so I created a small "daughter" board with the resistors on:
With the circuit finished and the stereo to mono mixing kink worked out I turned my attention to the box again.
Decoupage or so much sanding and varnishing
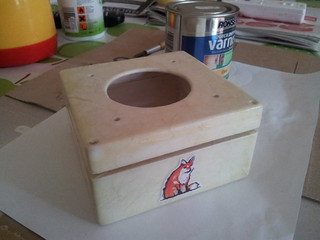
I opted to decoupage the box to give it a sort of antique look, which would also work well with the hessian speaker grill I was going to use. I first sanded down the box, filling in any holes etc with milliput (and sanding again). I then used a couple of coats of primer to seal the wood, the lightly sanded it all again, then spray painted it white:
I then took some nice textured paper and stuck it all over the box using watered-down PVA glue. I also printed out a copy of a fox illustration I scanned in and stuck that on with PVA glue too. Then I started applying layers varnish. Luckily I chose to use quick drying varnish, which meant I only had to wait an hour between coats. I would paint on three layers of varnish, letting it dry between coats, then sand down with progressively finer sandpaper. I would then varnish again and repeat. I think in the end I must of applied about fifteen coats of varnish in the end (sanding about five times). Eventually the surface started to look pretty good when sanded, but there were still a few tiny shiny spots on the otherwise matt surface. To remedy that I used some matt varnish spray paint, which was just enough to even out the finish nicely:
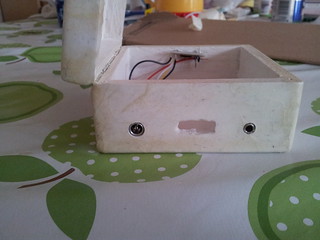
With the box finished I glued the power and audio (3.5mm) connector in place:
Re-gluing the speaker grill
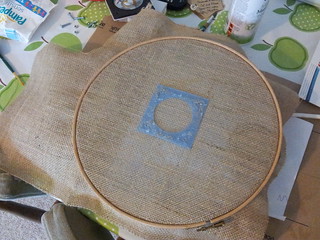
Now that the box looked nice and well finished I decided I'd best re-glue the speaker glue to make it look neater. Previously I'd just stretched the hessian by hand before sticking it to a piece of plastic, but that left things looking a bit wonky and not very taut either. This time I used a large embroidery hoop to stretch the hessian first, then stuck the plastic to the hessian using two part epoxy:
Once the epoxy dried I cut out the plastic from the rest of the hessian:
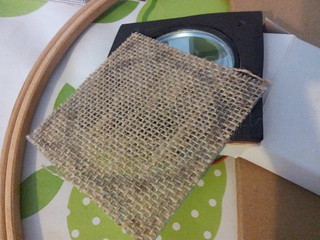
(NB. you can see the black foam seal here too)
Sealing the box
After I attached the circuit board with a small piece of wood and a screw to the inside of the box, I then needed to seal the box as best as possible. In case I needed to fix or adjust something inside the box I didn't glue the box shut (as the original monobox guide suggested). Instead I hot-glued some felt around the inside to help stop sound escaping through the gap between lid and bottom:
I then put in a bit of wadding to help further dampen any sound originating from inside the box:
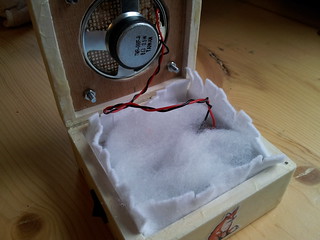
and then screwed the lid shut very tightly.
A little buzz
The finished box sounds great, but when running off the mains there is a buzzing sound in the background. You can only notice the sound when you are close by and nothing is playing. It's not enough to stop me using the monobox to play music, but it is annoying that it does it. My guess is that the power supply is adding in some extra noise. I did experiment with adding in some extra capacitors to smooth the power supply, but it didn't seem to make a difference. When running off batteries there is no such buzzing sound and it should quite happily run off a 9V battery for about 24 hours or so.
Here you can see the finished monobox in action: