Over the past two years I've been working on my largest and most complicated electronics project yet. My work on the project has ebbed and flowed, but it's mostly finished. So I thought I'd start writing up some notes on it.
The initial inspiration was seeing Jeff Faust's Arduino controlled z-scale train set. I'd been toying with the idea of getting a train set even since my first child was born, but space was very much a premium in the house. So z-scale appealed greatly. It didn't take much of a leap to then consider putting the train set inside a suitcase, so it'd be easy to store. So after saving up for a little bit, I picked up a Marklin z-scale starter set. I also picked up a turnout, a decoupler and a bit more track, so there was a little bit more interest to the layout.
Although, it's not finished, I wanted to get some of this written up now. If I wait till it's actually finished it may be a long time. Hopefully I'll go into more detail on a few bits at a later date as well. From an electronics point of view there are quite a few "modules" that would justify individual blog posts. For now I'm just going to provide an overview of my progress to date.
To give you a better idea of what the train set looks like here's a video of it all working:
The software/hardware architecture
The train set electronics consists of a Raspberry Pi, talking (via a serial port) to an Arduino. I used this arrangement due to the parts I had on hand. I had several Arduino Mini Pros lying around and a Raspberry Pi that was really looking to be used for something. It's not actually too bad a way of doing things.
The Arduino does the bulk of the interfacing with the train set. It controls the throttle, turnout, decoupler and lights. It also controls the deals with the track sensors.
The Raspberry Pi communicates with the Arduino via a serial connection. The Raspberry Pi effectively takes the place of a "regular" computer in this place and runs the user interface. It runs a small web app, that lets users control the train set itself. It also operates a small OLED screen embeded in the side. Currently the screen just outputs the IP address of the Raspberry Pi, but this will probably be expanded in the future.
There is also an ATtiny chip which controls the power button. As the Raspberry Pi needs to be shutdown in an orderly fashion this was needed to help control that. Simply pulling the power might lead to the SD card in the Raspberry Pi getting corrupted. The power button also works for turning the whole thing on in the first place.
Each of these various components probably need quite a bit more explanation. Hopefully I'll manage to write up some more notes on those in the future.
Building the scenery
There are quite a few in progress photos available on this album.
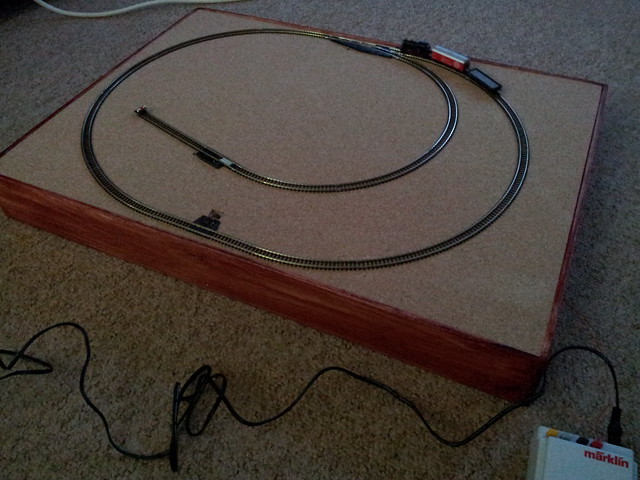
First of all I created a wooden frame to house a piece of pink insulation polystyrene. I added a layer of cork to this (attached with "no more nails", then pinned the track to that. This provided a nice flat surface for the train to run on:
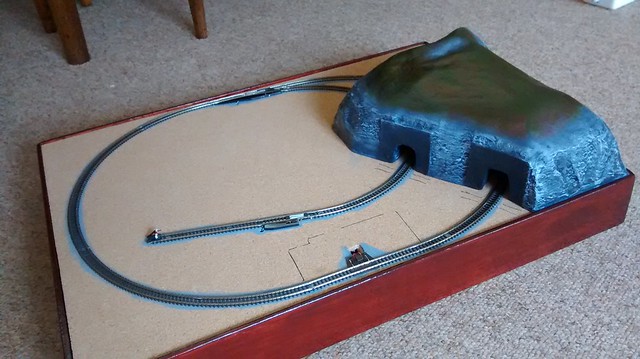
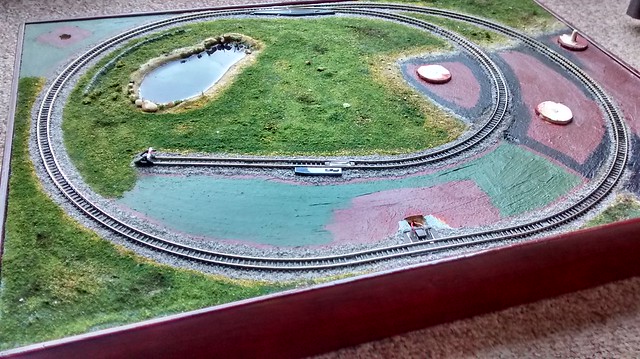
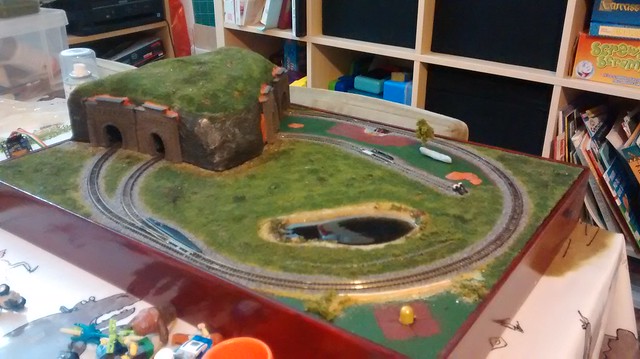
I then cut up some more of the polystyrene to create a tunnel section:
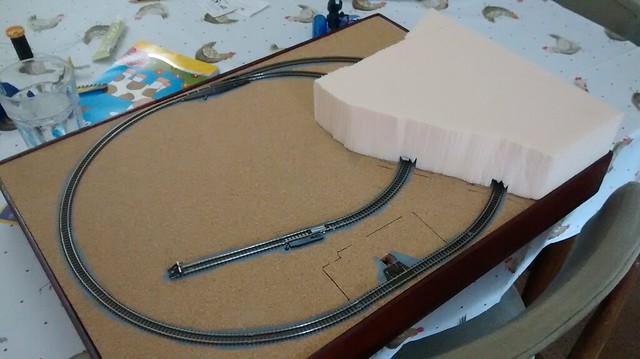
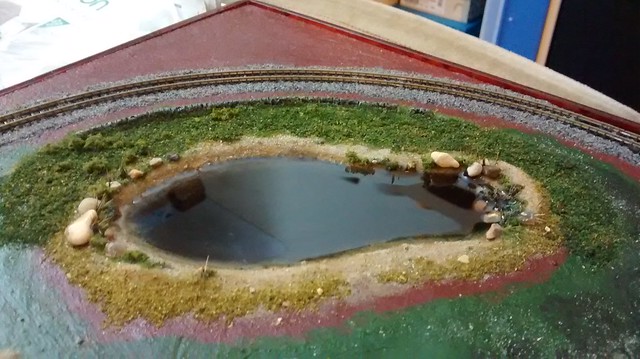
I then removed the track from the cork again and painted underneath. I used a brown coat for the overall areas, with grey underneath the track itself. At this point I also add a dip for a small lake/pond, as well as a few general lumps and bumps, so things didn't look quote so flat.
You can also see some small wooden disks. These were used to help secure the tunnel to the main board, whilst still allowing it to be removed, so the track could be cleaned or a stuck train recovered. The disks used magnets and small rods to keep the tunnel firmly in place.

Next I worked on the lake. First of all I painted the dip so it look more like a body of water, with muddy edges and a darker bottom. I also added some sand, small rocks and other little bits (like chopped up paint brush bristles).

I then added some clear resin over the top of that - which turned out very nicely.
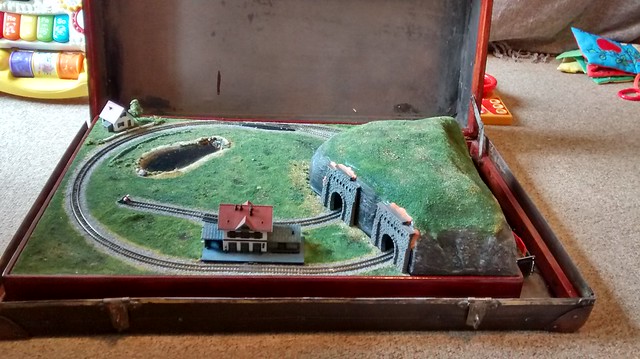
Then it was a case of flocking the main area, adding ballast around the track and a few more lumps and bumps to the ground:
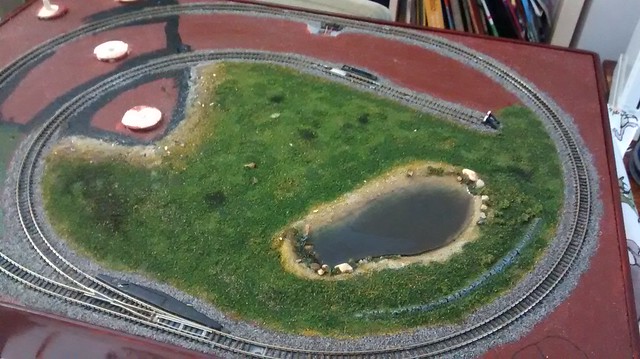
This stage was quite a pleasing process. Each night I was able to get a bit more done and the whole train set really started to look relatively professional.
Buildings
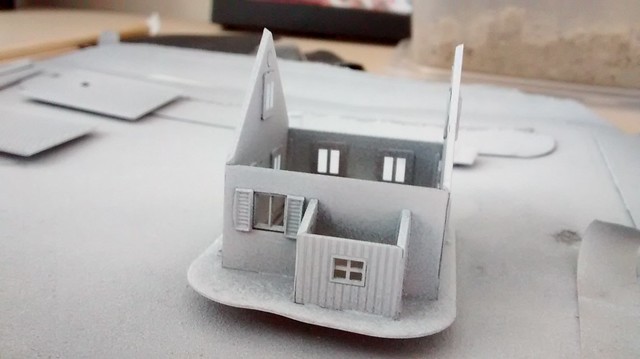
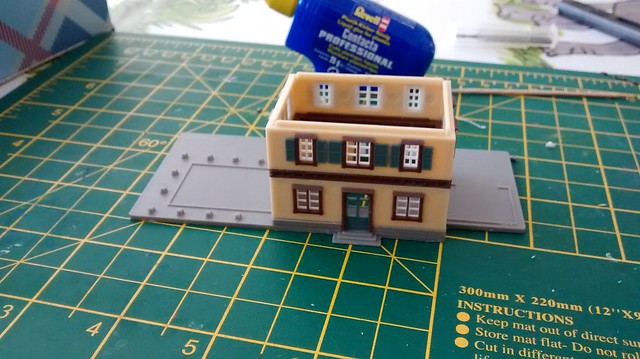
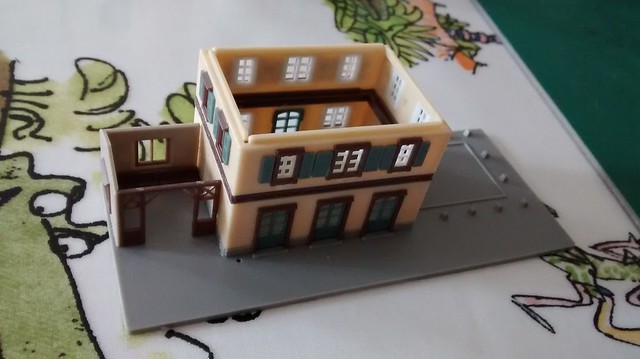
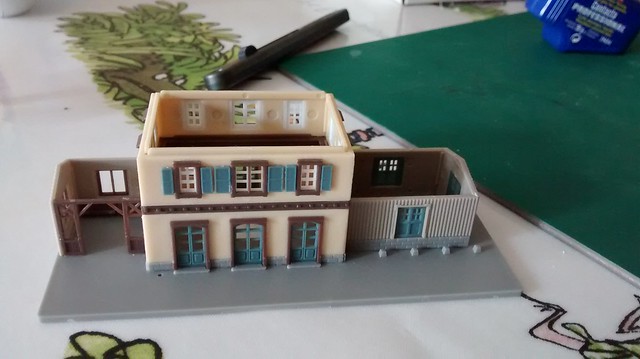
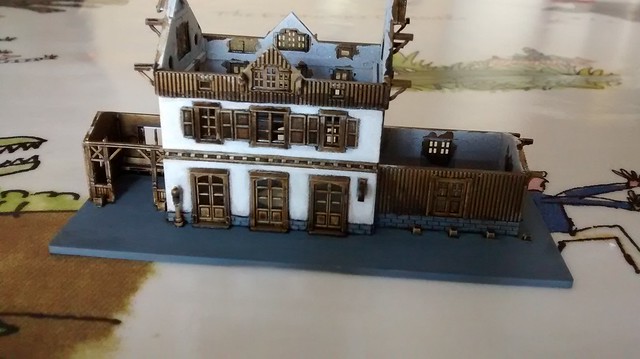
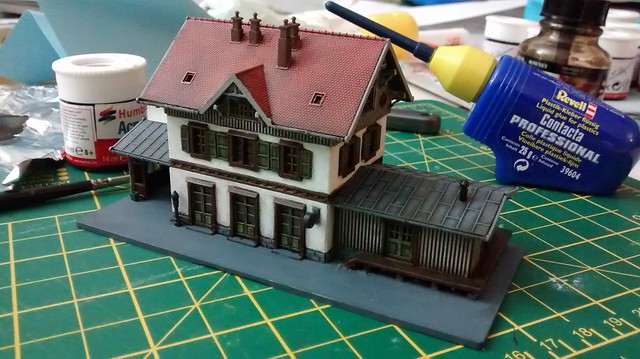
I bought two plastic building kits (made by Faller. One kit was for a station, then other a small house.
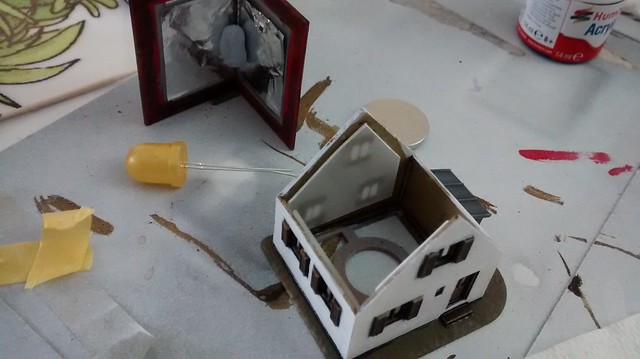
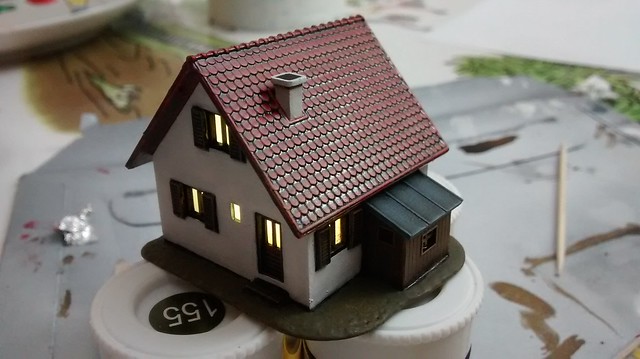
I started with the small house first. This was a pretty quick build, though having some tweezers was helpful for inserting the window pieces. I opted to paint the kit, rather than use the stickers provided.
I also decided to put lights in the buildings - that could be controlled via the UI of the app. For this I added some slightly opaque/frosted plastic behind the windows and used some large white LEDs that I painted with a thin coat of yellow and gold paint. The paint was used to give a slightly warmer yellow tinge to the light, without it being glaring white or too deep yellow.
The station kit was quite a bit more complicated:

But it came together fairly steadily.
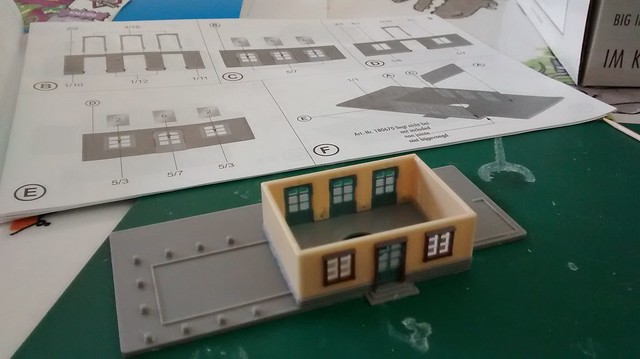
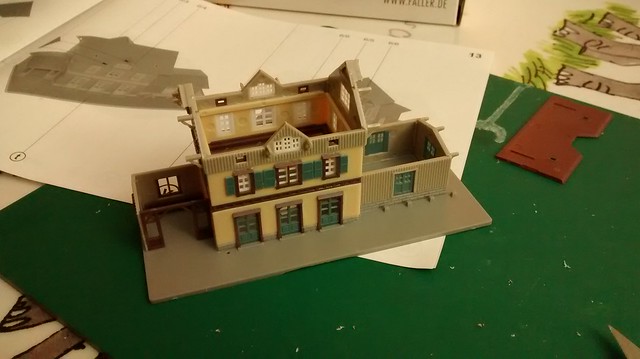
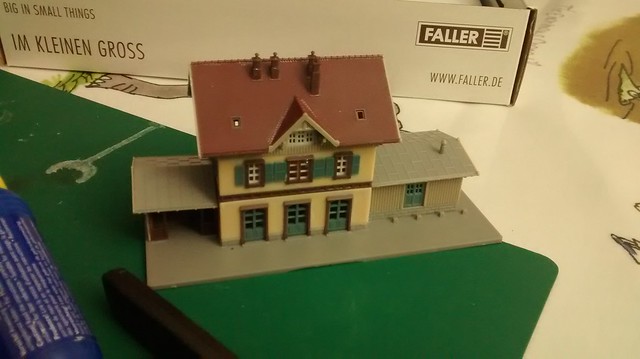
Again I opted to paint the station. For consistency I kept the colour scheme fairly similar to the house kit (white walls and red roof).


Mishaps and misadventures
I've definitely found this project quite challenging and it's been quite frustrating at times. Partly this has been due to my prior lack of knowledge of electronics. Also though has been the fact that the small size of z-scale means that it doesn't take much dust/grime to make the train stop running. This is still proving to be a bit of a nuisance and has been made a bit worse by adding all the ballast and flock - it's all basically just more stuff to get stuck in places.
The biggest problem though was actually burning out a train! I hadn't realised I'd done this for a while, as the train would mostly run ok, but would then get stuck and not want to move at all. After taking the train apart (to try to clean it) I noticed that one of the commutators on the motor shaft was no longer there! Memories of seeing a glowing spark emanating from the train suddenly emerged and I realised what had happened.
At this point I had to redesign the way the power to the throttle was provided and get a new starter set (as you can't buy just the train itself). I had been using PWM to control the throttle and this did seem to make the train run a little hot. After I took apart the manual throttle to see how that worked I had a plan. That throttle just used an LM317 variable voltage regulator to alter the voltage directly (plus a big copper heatsink, as it's pretty inefficient). So I ended up making a circuit that would control an LM317 digitally and then patching that into the existing circuit boards (bypassing and removing the previous throttle control). This actually worked and the new train runs a lot cooler, without any major problems so far.
Anyway, that's enough about this for now. Hopefully I'll manage to cover more of the electronics in detail in the future.
For what it's worth the code for all of this is on my train repository on github. It's all quite specific to my setup, but may be of interest to some.